Download the installer for your computer, then configure the AI service you plan to use.
Install the appDownload the installer for your Mac or Windows computer.
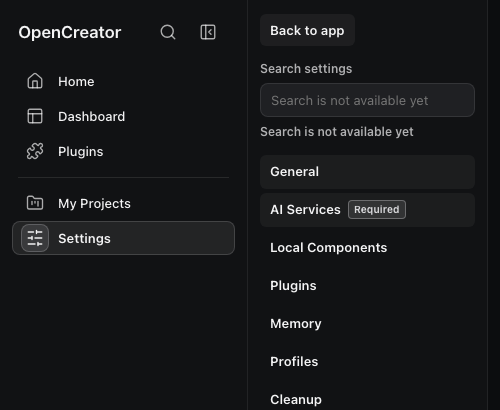
Find the settingsOpen Settings → AI Services and use the screenshots to locate the fields.
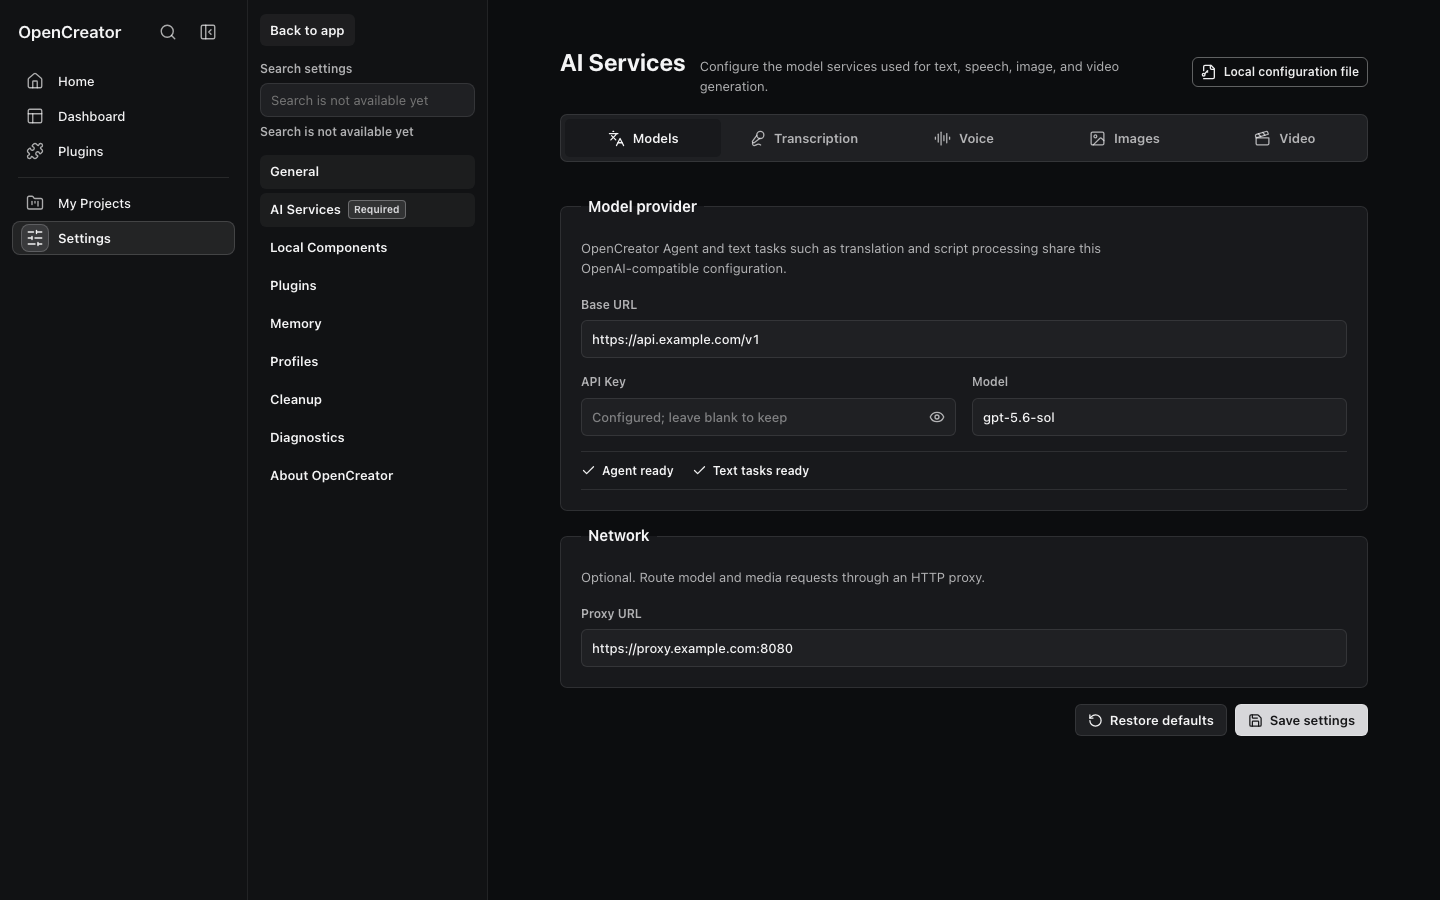
Enter provider detailsChoose a service in the provider reference and enter its Base URL, API Key, and model. Add a proxy URL if your network needs one.
Run a real testFollow Verify your setup. A text reply or an image you can preview and download confirms that service works. If the request fails, see Troubleshooting.
Open Settings in the left sidebar, then select AI Services. In Models, enter the Base URL, API Key, and Model; the Network area below has the Proxy URL field. Use the tabs across the top for image, voice, transcription, and video services.
Navigation: Settings → AI ServicesAI Services → Models. Open the image to see it at full size. The api.example.com address and model shown are illustrative; use the provider reference below for actual values.
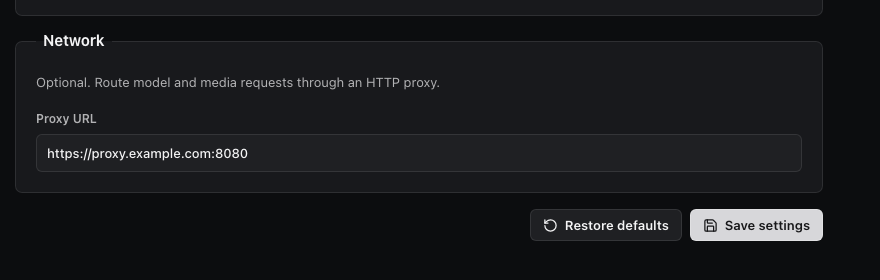
If your network cannot reach a required AI service or media address directly, enter an HTTP or HTTPS proxy you already have. The proxy routes model and media requests. It is separate from the provider's Base URL and does not replace its API Key.
Settings → AI Services → Models → Network. The proxy.example.com address in the screenshot is illustrative; enter your own proxy URL.
Make sure the proxy is runningGet its HTTP/HTTPS address and port from your proxy tool or network administrator. For a proxy running on this computer, an address may look like http://127.0.0.1:7890; use the port your tool actually provides.
Enter it in OpenCreatorOpen Settings → AI Services → Models, find Network → Proxy URL, enter the full http:// or https:// URL, and select Save settings. This field is optional; socks5:// URLs are not accepted.
Verify the connectionRun a small test. If it still times out, check that the proxy is running and its address and port are correct, then check the provider Base URL, model, and API Key.
yt-dlp video extractor
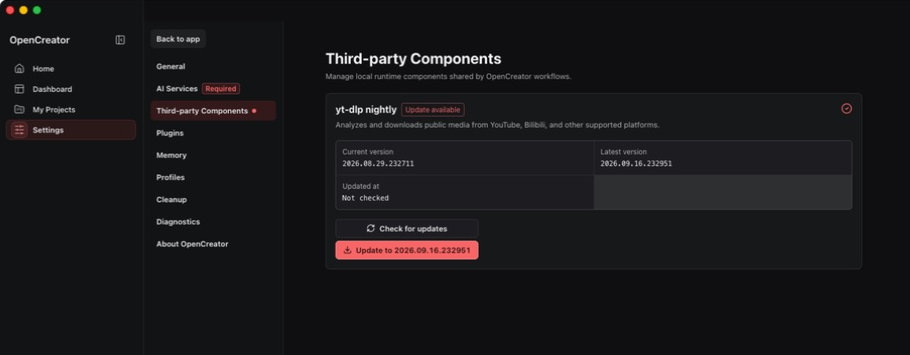
OpenCreator uses yt-dlp to analyze and download public videos from supported platforms such as YouTube and Bilibili. If you use a platform video URL, open Settings → Third-party Components and check the yt-dlp nightly status. Importing a local video file does not require this step.
Settings → Third-party Components → yt-dlp nightly. Version numbers and update status depend on your installation.
Check the current versionFind yt-dlp nightly in Third-party Components. A current version number means the local Runtime found the component; you do not need to install it separately in a terminal.
Check and update when neededSelect Check for updates. If a newer version appears, select Update to…; checking alone does not install it. If a platform changes and a URL stops working, update yt-dlp and retry.
Test a video URLOpen Video Downloader from the Dashboard and submit an accessible public video URL. If OpenCreator cannot reach the platform, check the URL and your network proxy first. If the extractor may be outdated, check for a yt-dlp update.
If the update download fails, check your network and proxy URL. A failed verification or save leaves the current working version available.
Understand the configuration fields
OpenCreator connects to external AI services. These four fields tell it which service to call and how.
01
Provider
Which company provides the AI service?
02
Base URL
Where should OpenCreator send requests?
03
API Key
Which credential authorizes the request?
04
Model
Which model should the service run?
Example: a DeepSeek text model
Provider
DeepSeek
The AI service you chose.
Base URL
https://api.deepseek.com
The service's root address.
API Key
Your DeepSeek API Key
Created in the DeepSeek platform.
Model
deepseek-v4-pro
The specific model ID to use.
Provider reference
Find a service by task, then use its detailed entry below. Model IDs are examples; use an ID available to your account if the provider's catalog has changed.
For example, enter https://api.deepseek.com exactly as listed in the provider reference.
Correct: https://api.deepseek.com
Do not enter: https://api.deepseek.com/chat/completions
OpenCreator calls the specific API endpoint itself. Enter only the service's root address.
Do not mix API Keys from different providers
Each key belongs to the company that issued it.
An OpenAI API Key cannot call DeepSeek. A DeepSeek API Key cannot call Gemini. A Gemini API Key cannot call Seedance.
Match each Base URL with an API Key from the same provider.
Creator guides
Open a tool from the Dashboard. These two workflows use a configured image service or the model and transcription services needed for video translation.
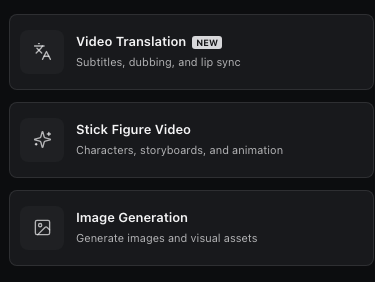
Cropped Dashboard tool list: Video Translation and Image Generation.
Enter a prompt. Optionally add a reference image and choose the aspect ratio and output count.
Preview and download the result. If generation fails, check the image provider's key, model, and quota.
Translate a video
Prepare a video and configure a text model and transcription service. Configure a voice service if you also need dubbing. For supported online video URLs, check the yt-dlp status first.
Open the Dashboard, choose Video Translation, and import a local video or accessible video URL.
Choose the source and target languages, review the transcript and subtitles, and adjust dubbing or subtitle styles if needed.
Preview the result, then export subtitles, audio, or video. If the task stops at transcription, check that service first.
Start with the symptom shown by OpenCreator or the provider, then retry a small task. Never share an API Key in screenshots or support requests.
Authentication failed or 401 / 403
Use a key from the provider behind the current Base URL. Check that your account can call the selected model, then re-enter and save the key.
Model not found or 404
Check the model ID against your account's available models. Enter only the service root as the Base URL, without an endpoint such as /chat/completions.
Quota exceeded, rate limited, or 429
Check balance, quota, and rate limits in the provider console, then retry later. Make sure the chosen model is enabled for your account.
Connection timed out
Retry with a short request. If your network needs a proxy, follow the network proxy setup and check that it is running with the right address and port. Then check access to the provider address.
Online video URL cannot be analyzed or downloaded
Confirm the URL is accessible and the platform is supported. Check your proxy URL if the network requires one. If the platform has changed its rules, check and update yt-dlp in Third-party Components, then retry.
Settings saved, but no result appears
Check that the tool uses the service you configured, then follow the small tests. Text, image, transcription, and voice services are configured separately.